In this post, I’ll show you how to build a DIY IoT Door Lock Monitoring System using a small M5Stamp PICO controller and Qubitro.
Things used in this project
| Hardware components | ||||
 | Arduino 101 | × | 1 |
Story
Hey, what’s up, Guys! Pradeep here
I have a cute little cousin. But, he sometimes opens up the fridge and eats some snacks or some unwanted stuff when everyone is at work. So, I want to catch him when he opens the door. And I also added Qubitro to record the data and monitor it over the internet.
Component Requirements:
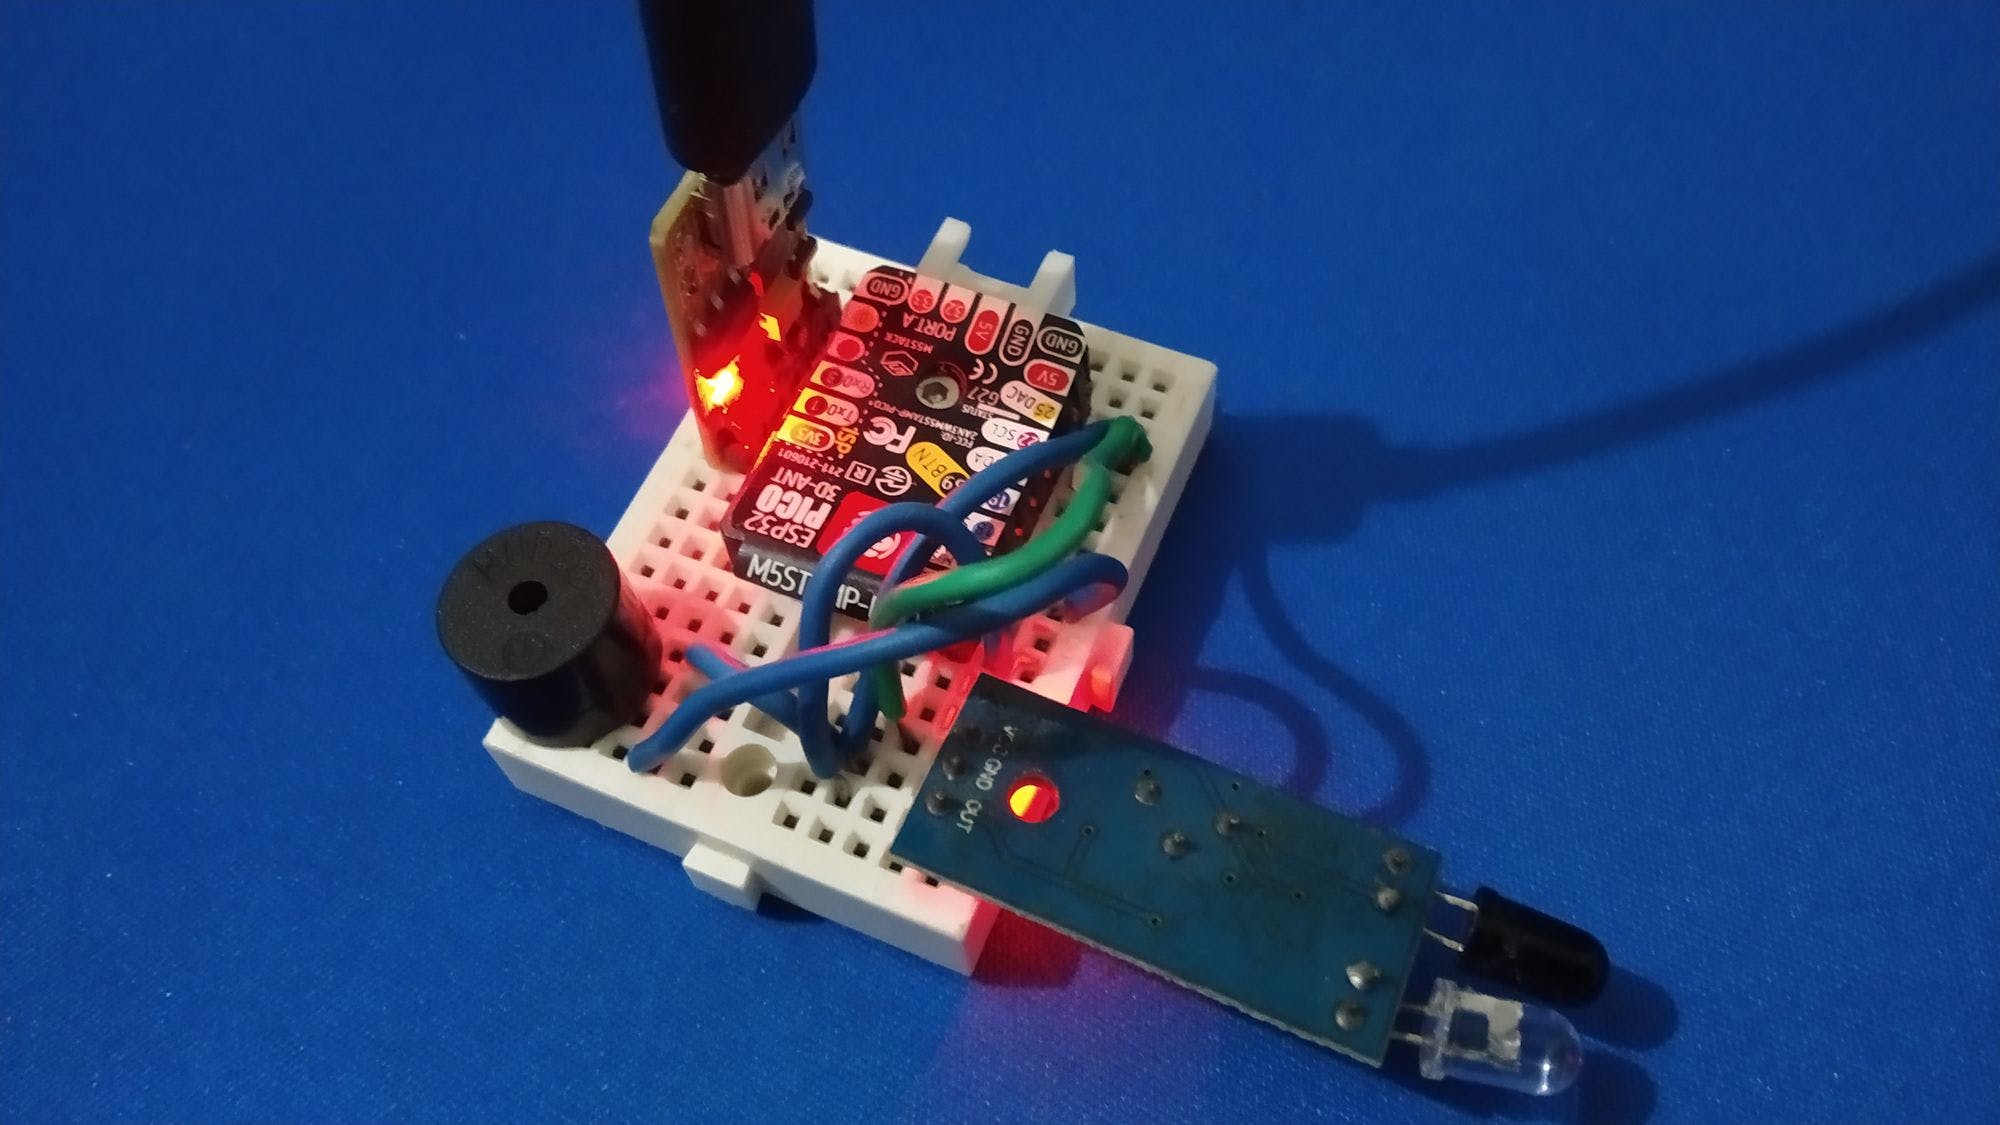
- 1. M5Stamp PICO.
- 2. IR Sensor.
- 3. Some wires.
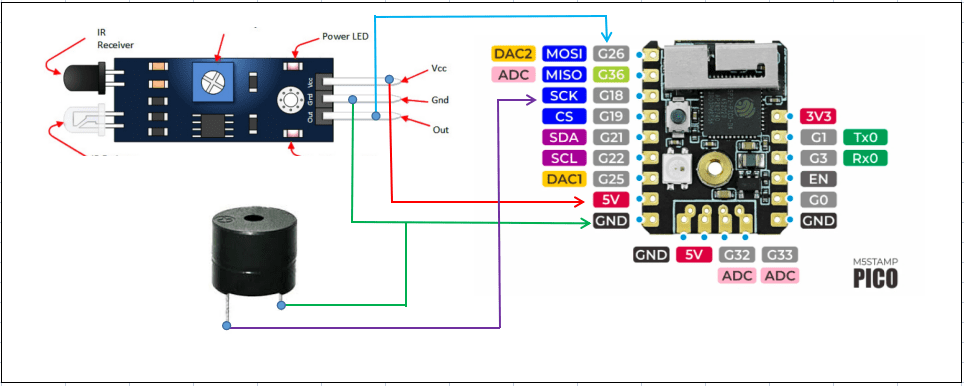
Circuit Connection:
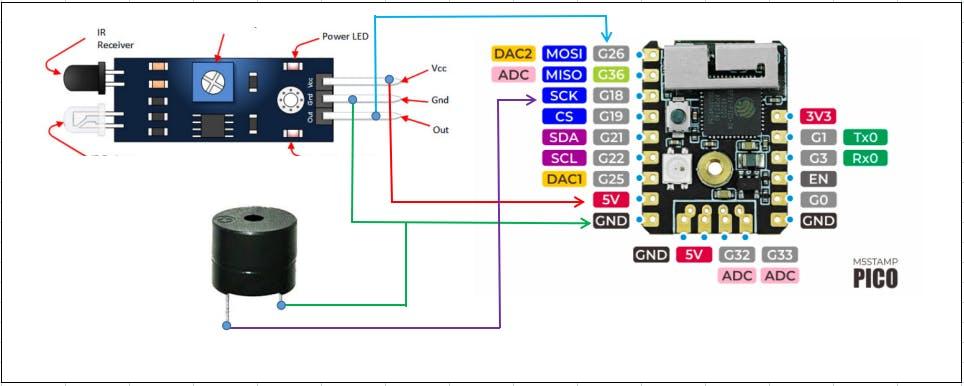
Circuit Connection
Coding Part:
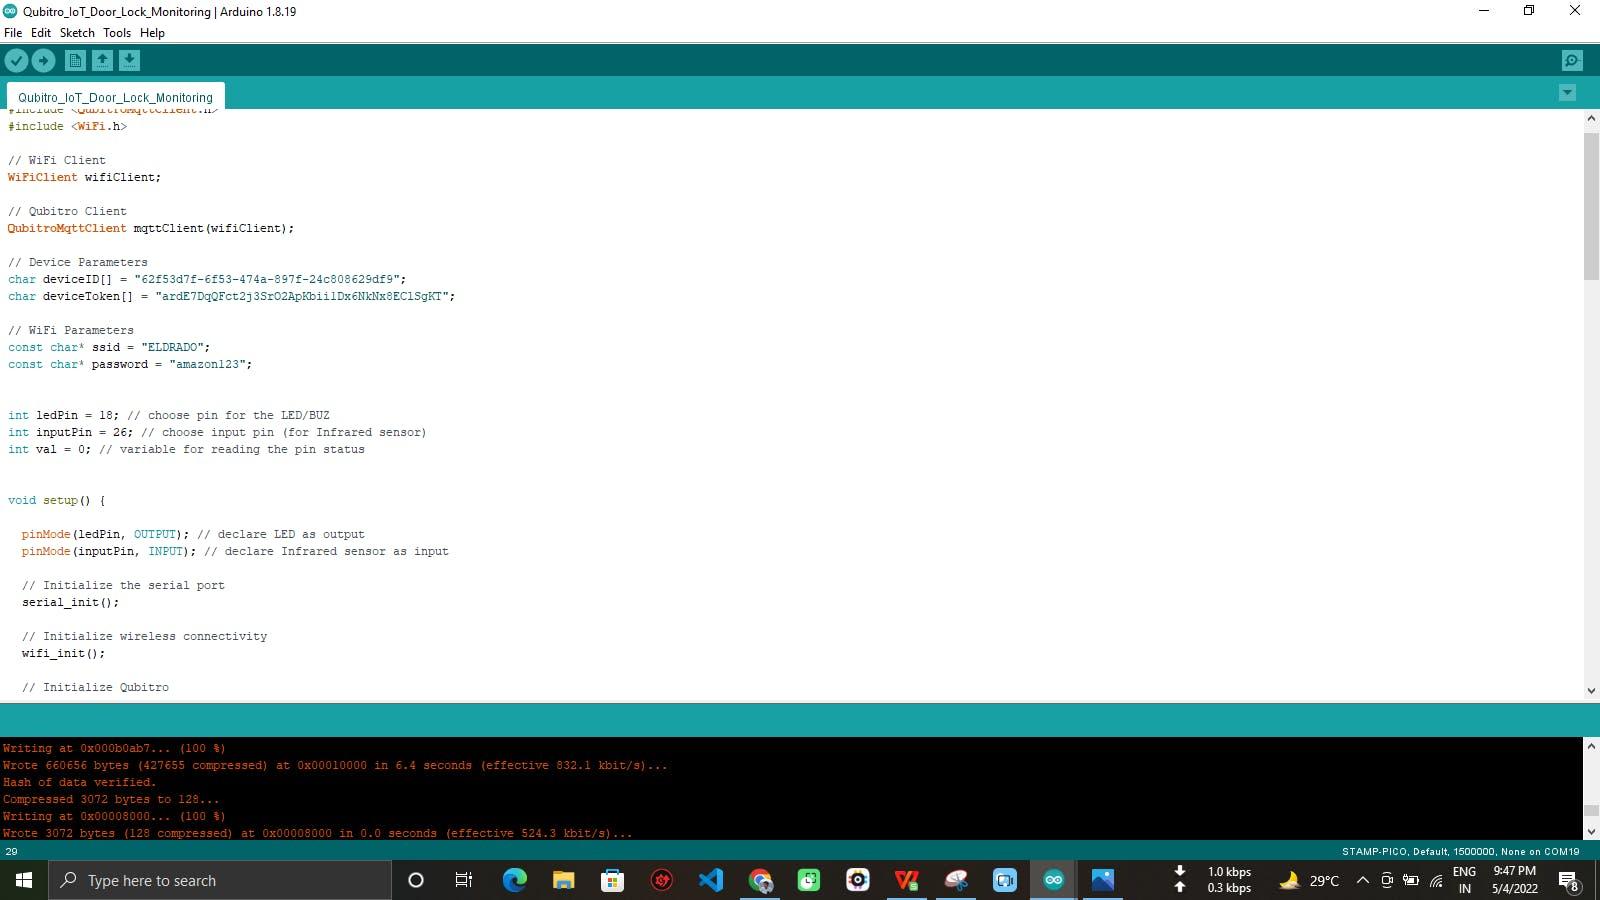
Please configure the code with your network credentials, which I have included below.
Change the Device ID and Device Token to match your Qubitro Cloud. If you’re new to Qubitro, follow the steps below to learn all you need to know about Qubitro and how to set up Qubitro Cloud.

After you’ve completed the above steps, use the Arduino IDE to compile the script and upload it to your M5Stamp.
#include <QubitroMqttClient.h>
#include <WiFi.h>
// WiFi Client
WiFiClient wifiClient;
// Qubitro Client
QubitroMqttClient mqttClient(wifiClient);
// Device Parameters
char deviceID[] = "62f53d7f-6f53-474a-897f-24c808629df9";
char deviceToken[] = "ardE7DqQFct2j3SrO2ApKbii1Dx6NkNx8EClSgKT";
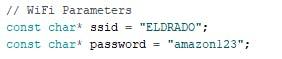
// WiFi Parameters
const char* ssid = "ELDRADO";
const char* password = "amazon123";
int ledPin = 18; // choose pin for the LED/BUZ
int inputPin = 26; // choose input pin (for Infrared sensor)
int val = 0; // variable for reading the pin status
void setup() {
pinMode(ledPin, OUTPUT); // declare LED as output
pinMode(inputPin, INPUT); // declare Infrared sensor as input
// Initialize the serial port
serial_init();
// Initialize wireless connectivity
wifi_init();
// Initialize Qubitro
qubitro_init();
}
void loop() {
val = digitalRead(inputPin); // read input value
if (val == HIGH)
{ // check if the input is HIGH
digitalWrite(ledPin, LOW); // turn LED OFF
String Status = "Open";
int Rate = 100;
// Send telemetry
String payload = "{\"status\": \"" + Status + "\", \"Rate\": " + String(Rate) + "}";
mqttClient.poll();
mqttClient.beginMessage(deviceID);
mqttClient.print(payload);
mqttClient.endMessage();
Serial.println(payload);
}
else
{
digitalWrite(ledPin, HIGH); // turn LED ON
String Status = "Close";
int Rate = 0;
// Send telemetry
String payload = "{\"status\": \"" + Status + "\", \"Rate\": " + String(Rate) + "}";
mqttClient.poll();
mqttClient.beginMessage(deviceID);
mqttClient.print(payload);
mqttClient.endMessage();
Serial.println(payload);
}
delay(2000);
}
// Initialization code
void serial_init() {
// Initiate serial port connection
Serial.begin(115200);
// Delay for stabilization
delay(200);
}
void wifi_init() {
// Set WiFi mode
WiFi.mode(WIFI_STA);
// Disconnect WiFi
WiFi.disconnect();
delay(100);
// Initiate WiFi connection
WiFi.begin(ssid, password);
// Print connectivity status to the terminal
Serial.print("Connecting to WiFi...");
while (true)
{
delay(1000);
Serial.print(".");
if (WiFi.status() == WL_CONNECTED)
{
Serial.println("");
Serial.println("WiFi Connected.");
Serial.print("Local IP: ");
Serial.println(WiFi.localIP());
Serial.print("RSSI: ");
Serial.println(WiFi.RSSI());
break;
}
}
}
void qubitro_init() {
char host[] = "broker.qubitro.com";
int port = 1883;
mqttClient.setId(deviceID);
mqttClient.setDeviceIdToken(deviceID, deviceToken);
Serial.println("Connecting to Qubitro...");
if (!mqttClient.connect(host, port))
{
Serial.print("Connection failed. Error code: ");
Serial.println(mqttClient.connectError());
Serial.println("Visit docs.qubitro.com or create a new issue on github.com/qubitro");
}
Serial.println("Connected to Qubitro.");
mqttClient.subscribe(deviceID);
}
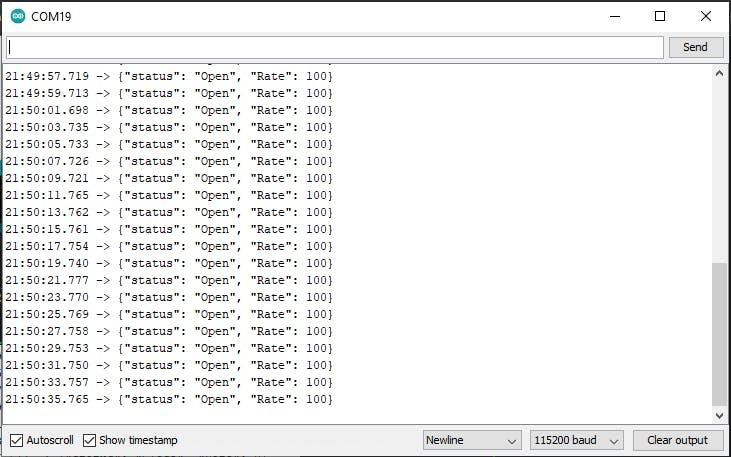
Check the serial monitor results after you’ve uploaded the script.
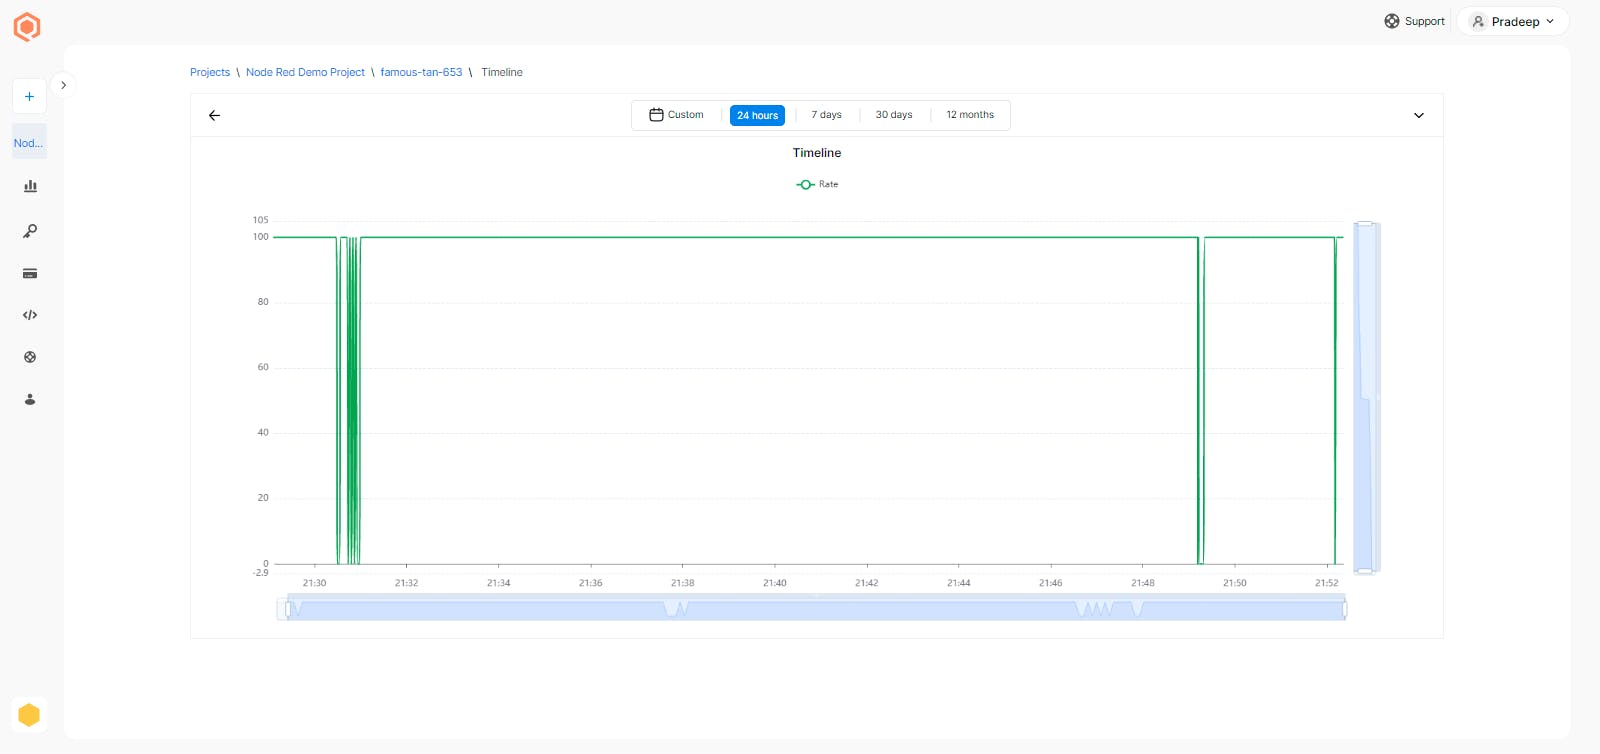
Data Visualization:
After that, go to Qubitro Portal and check out the incoming data. Once you have the data, you can begin the visualization process.
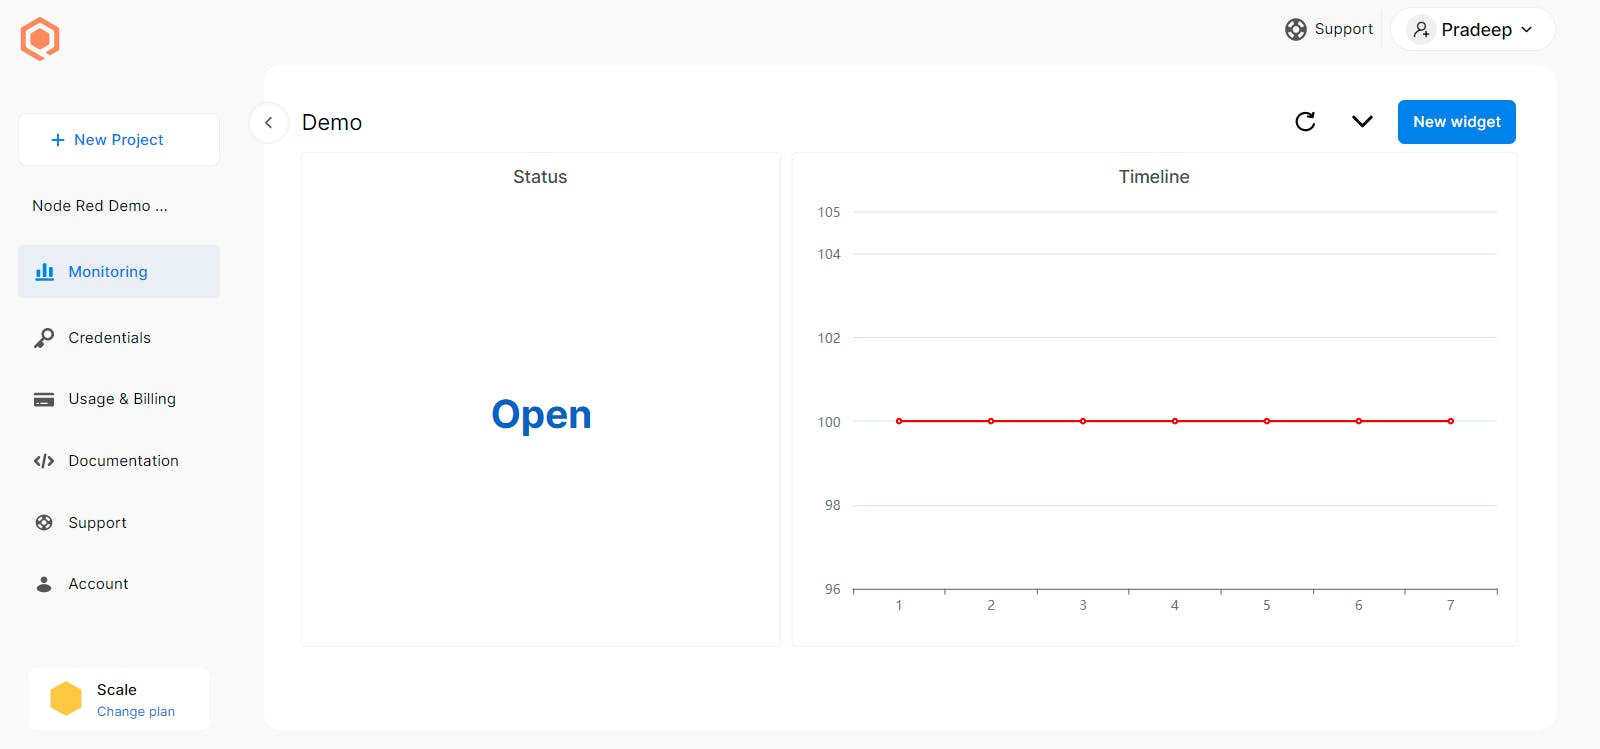
Here are the timeline details, whenever the door opens, it comes to 0, and it will be 100 when the door is closed.
Conclusion:
That’s all about this blog; I have tested this with my door. I hope you guys like this one. I will meet with another interesting tutorial; let’s keep making.
Schematics
Circuit Connection