
In this project, I have shown how to use Thingy:91 with Edge Impulse to toast your bread perfectly.

Things used in this project
| Hardware components | ||||
 | Nordic Semiconductor Thingy:91 Multi-sensor cellular IoT Prototyping Platform | × | 1 | |
| Software apps and online services | ||||
 | Edge Impulse Studio |
Story
As a bachelor, I know the struggle of cooking on my own. Sometimes I used to toast the bread on the pan, but most of the time it went wrong, when I look around I just found the Thingy:91, Luckily Thingy:91 supports Edge Impulse, so I decide to make a “Toast master with Thingy:91”

Hardware Setup:
To set up a Thingy:91 with Edge Impulse, we need to boot the Edge Impulse Firmware on it. Follow the below instructions to flash the firmware. This one was a official guide given by the Edge Impulse.
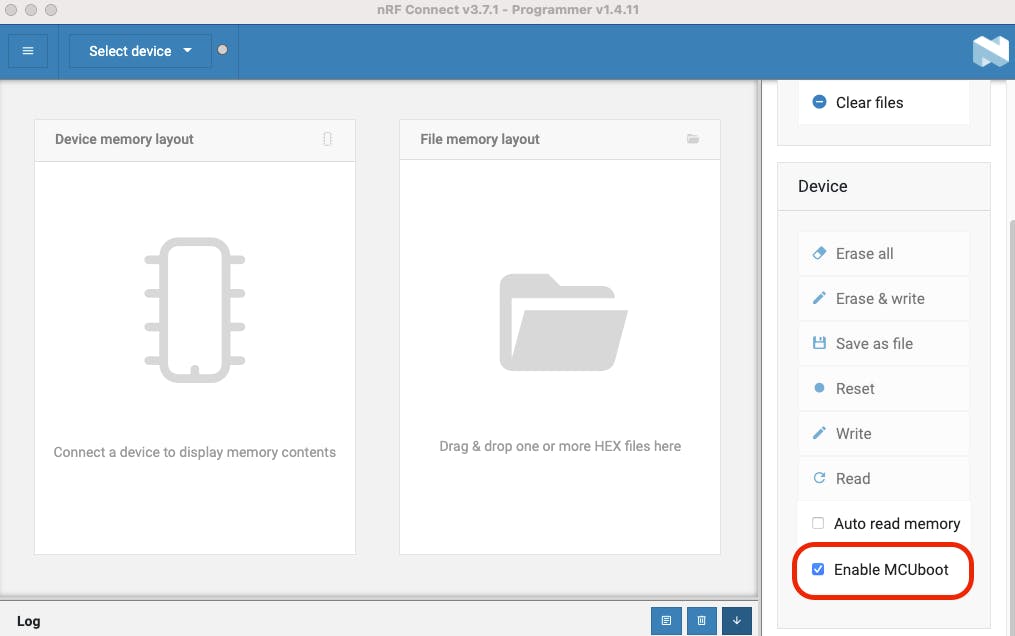
1. Connect the Thingy:91 to your computer and power on the Thingy:912. Download the latest Edge Impulse firmware. The extracted archive contains the following files: [firmware.hex: the Edge Impulse firmware image for the nRF9160 SoC, and connectivity-bridge.hex]3. Open nRF Connect for Desktop and launch the Programmer application.Scroll down in the menu on the right and make sure Enable MCUboot is selected.
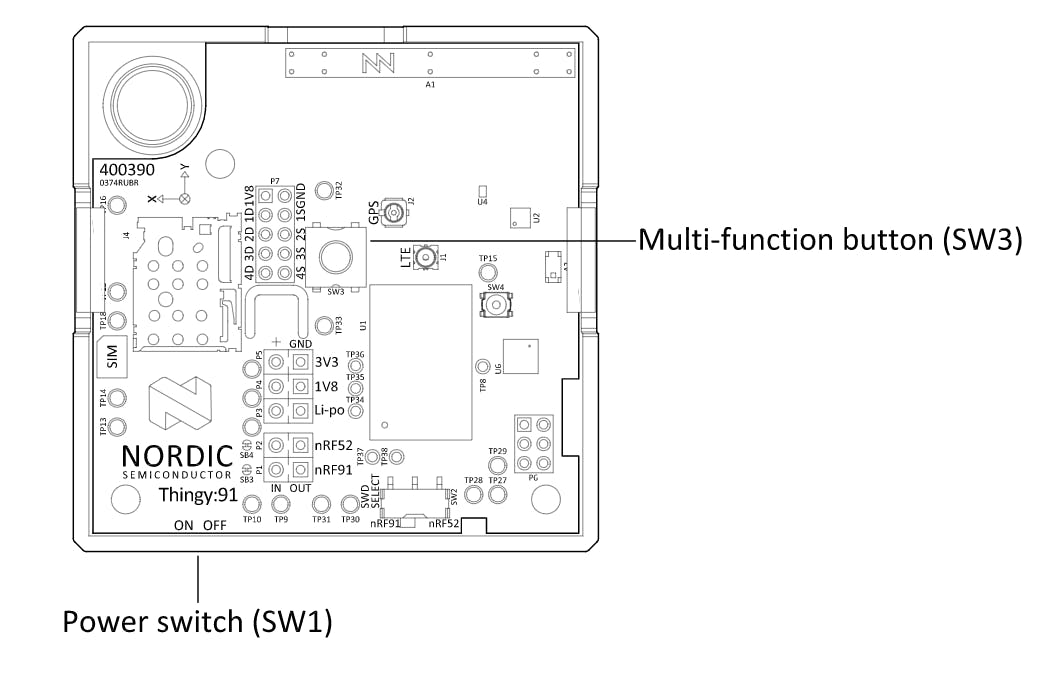
First Enable MCUboot then Switch off the Nordic Thingy:91.Press the multi-function button (SW3) while switching SW1 to the ON position.
In the Programmer navigation bar, click Select device.In the menu on the right, click Add HEX file > Browse, and select the firmware.hex file from the firmware previously downloaded. Scroll down in the menu on the right to Device and click Write:

In the MCUboot DFU window, click Write. When the update is complete, a completed successfully message appears. You can now disconnect and reconnect the board.
Now you have successfully uploaded the firmware, then the next step is to connect the Thingy:91 to the Edge Impulse Server.
edge-impulse-daemonEnter this command into your CMD.

Select the first one.

Give the name to your development board. Let’s start the Data Collection.
Data Collection and Classification:
Follow this tutorial to set the Data Collection and Classification, I have set my Thingy:91 nearby to my pan and stated my cooking.
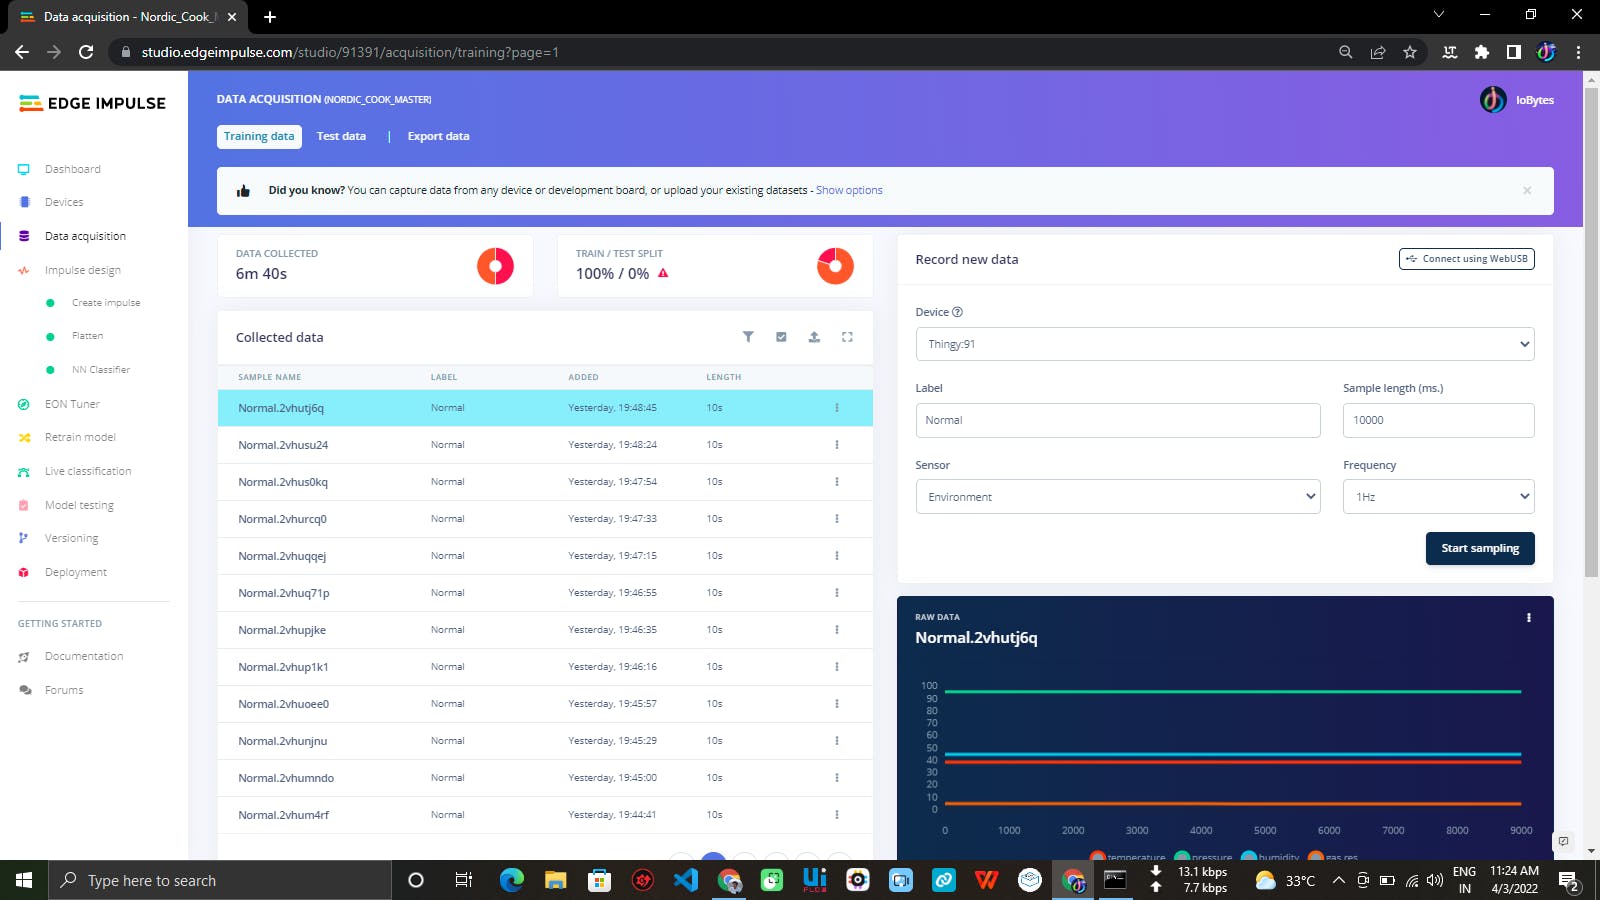
First I collected some normal data that time I manage to toast my bread perfectly, then I over toasted my bread and collected some data.

For this I have collected Environmental data.[Temp, Humid, Pressure, Gas], The temp was increased and Humid was decreases when I over toasted. I collected 6 Mint of data.
Then created impulse with Flatten and NN Classification. And train the model.


That’s all you have successfully trained your model now test our model, to check how it’s performing.
First I took some normal data. See how it’s performing.

This is how it’s performing on up normal conditions.

So now my thingy can identify my Toast condition.
Here is my Edge Impulse project: https://studio.edgeimpulse.com/public/91391/latest
Future Works:
Deploying the model in Thingy:91 core and make some Bluetooth alert functions.